Granola Bars, Violet-Style.

Mmmmm...

Mmmmm…

This is a recipe that I haven’t made in EONS, but my friend Kat asked if I had a recipe, so I figured I’d post it for my own future use. My kids really love it, so I should probably make it again at some point, right?

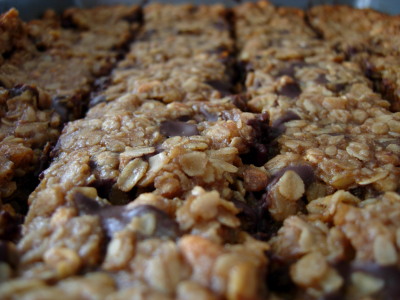
Homemade Granola Bars Violet-style.

Ingredients:
3 1/2 cups rolled oats (not quick-cooking)
1 cup high-fibre, crunchy cereal
1 cup whole wheat flour
1 teaspoon baking soda
1 teaspoon vanilla extract
1 cup melted margarine (or butter)
1/3 cup of brown sugar
2 cups of chocolate chips (or raisins, coconut, peanuts, etc.)
1 cup of honey (approx.)

Directions:
1. Preheat oven to 325F. Spray 11×13 pan with non-stick spray or grease with butter/margarine if you prefer.

2. Melt butter/margarine in microwave.

3. In a large bowl, mix oats, flour, baking soda, vanilla, melted butter, brown sugar.

4. One things are well-mixed, add in chocolate chips (or nuts, raisins,etc) Then add as much honey as required to make everything sticky (usually about 3/4 of a cup – but it depends on your dry ingredients)

5. Firmly press ingredients into the pan. Bake for 18-22 minutes or until golden brown. The bars will puff up around the edges a bit and the middle will still be soft. They will firm-up as they cool.

6. Remove from oven and allow to cool for about 5-10 minutes. Cut into bars and let cool fully in the pan before removing.


Notes:

You can add all sorts of good things to these bars. When one of my kids had a health issue that necessitated extra fibre, we added some of that powder stuff you can dissolve in juice. If I want to send these to school with the kids, I leave out anything nut-related (since the schools around here are nut-free).  I have no idea how long these will last in storage because they usually don’t last more than a few days in our house.
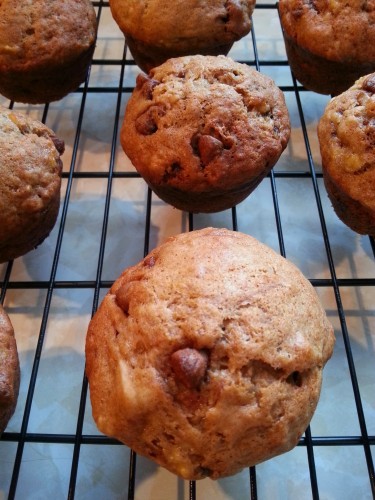
Banana Chocolate Chip Muffins

20140217_142535

Muffins!

I’ve been away for a bit – travelling for work – so haven’t had a lot of chances to bake anything new or crochet anything fancy. But it’s a long weekend here in Ontario and I had some older bananas to use up. One thing led to another and now there are muffins cooling on my counter.

Banana Chocolate Chip Muffins

Makes 12 large muffins (not ‘jumbo’, just large). 

Ingredients:

2 cups flour
3/4 cup chocolate chips
2 teaspoons baking powder
1 1/2 teaspoons cinnamon
1/2 teaspoon baking soda
1/4 teaspoon salt
4 mashed bananas
3/4 cups packed brown sugar
1 egg
6 tablespoons oil
1 teaspoon vanilla
Directions:
  1. Preheat the oven to 375F.  Spray or grease-and-flour a muffin tray. You could use cupcake liners if you happen to know where yours are at the moment – some of us aren’t that prepared for this whole thing.
  2. Mix together the bananas, egg, oil, vanilla, and brown sugar.
  3. Add in the remaining ingredients and mix just ’til everything is combined.
  4. Spoon the mixture into the muffin cups.
  5. Bake for 18-22 minutes (test after 18 minutes) – or until the toothpick comes out clean.
  6. Allow to cool in the pan for a few minutes, then transfer to a wire rack to finish cooling. Or, y’know, eat them scaldingly hot and burn your tongue. Whatever works for you.

Swedish Pancakes.

Growing up, I often spent a weekend (or even a full week) sleeping over at my maternal grandmother’s house.  Her maiden name was Daisy Ida Marie Skoog. One of the highlights of staying over was waking up to find her heating up the pancake pan and using her hand mixer (it looked like this one, but with a black handle) to get the batter ready.

When Nana died, I inherited her pancake pan. I didn’t use it at all, however, because I wasn’t sure how to use it – so it went into a box with several other things that I treasure but don’t use/display.

This week I decided to dig it out, clean it up, reseason the cast iron, and make some good ol’ Swedish pancakes.

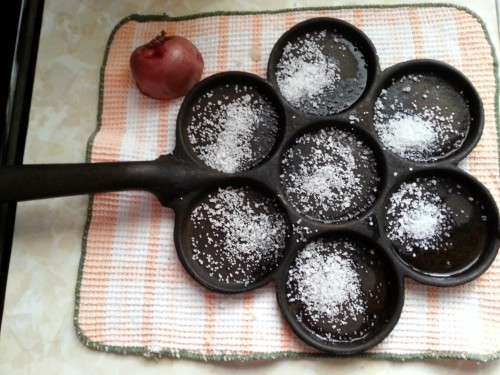
Here’s a photo of the cleaning up of the plett pan.

Plett, salt, and potato.

Plett pan, salt, and potato.

The basic idea is to sprinkle the cast iron with coarse salt and use a wedge of potato to scrub off rust, flaky bits, or anything stuck to it. I rinsed once, then repeated the process, and the pan came out beautifully. I then oiled it up with a fine coat of vegetable oil and put it in the oven for an hour at 300F to reseason the cast iron. Let it cool and TA DA! Reseasoned cast iron!

I have several children and making Swedish pancakes for a meal, for all of them, would have required me to start at 7 am and work all morning – so, instead, I made them as a snack.  I have my grandmother’s recipe but, recognizing that she didn’t bother to measure anything, I adjusted it slightly to bring it all closer to what I remember the texture, flavour, and appearance being when I was a kid.

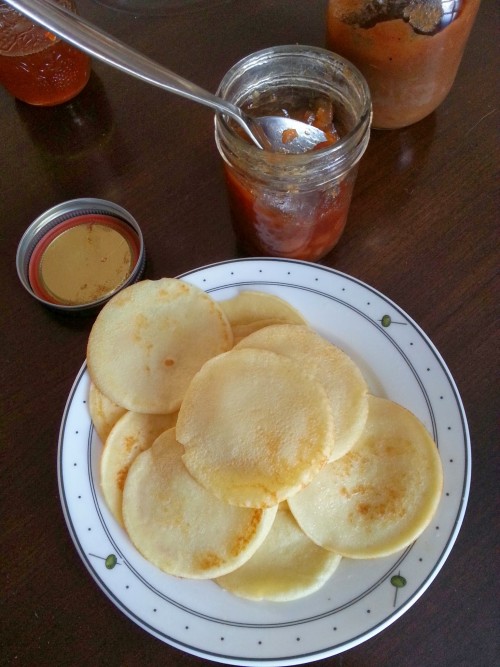
Here’s a plate of Swedish pancakes with some homemade jam:

Little Pancakes!

Little Pancakes!

The first attempt was too dark, the second was too thick, and finally, finally, they turned out just right for the remaining 10-ish attempts. Lightly golden, slightly crisp at the edges, and sweet.  You could adapt these to be made in a regular pan (I realize that the plett pan is a bit of a random thing for most people). As a kid, I could eat an entire batch on my own.

Here’s the recipe:

Daisy Ida Marie Skoog’s Swedish Pancakes

Makes a lot of pancakes. No idea how many.

Ingredients:

3 eggs, beaten
2 cups of milk
1 1/4 cups of flour (see notes)
6 tablespoons of melted butter (see notes)

Directions:

  1. Combine all ingredients together. Mix well.
  2. Heat pan to medium (see notes). Brush lightly with a bit of butter.
  3. Spoon a small amount of batter into each section.
  4. Cook until puffed up (small bubbles form), flip the pancakes, cook until golden.

Notes:

  1. The original recipe called for just 1 cup of flour. The batter was so runny and didn’t cook well in the pan. I increased by about a quarter cup.
  2. I think I could have used less melted butter in the batter and, next time, I’ll decrease to 4 and see what happens.
  3. “Medium” for the pan was around a ‘4’ on my gas range. I don’t normally cook on cast iron pans, so it took a bit of adjusting for me to get a temperature that wasn’t ridiculously hot or too low. It should take about 2 minutes to cook a pancake – one minute per side, give or take a bit.

Violet’s Vitamin C Breakfast.

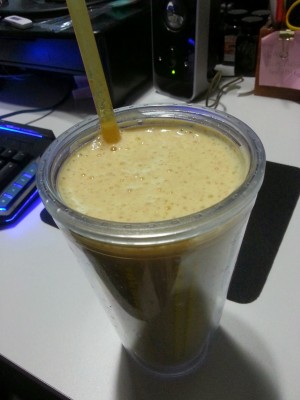
Mmm.. smoothie.

Mmm.. smoothie.

There are few things that I love more than kitchen-related gadgets – except maybe when kitchen gadgets go on sale at Costco and then they’re a really good deal. I emptied my piggybank this week and bought a Blendtec blender. It was a really good deal.

The blender, so far at least, is all that it’s cracked up to be. Powerful as all get-out, loud as all get-out, and fun. You may know the name from the “Will It Blend” series – and the answer is, Holy Crap, It Will Totally Blend and You Will Squeak With Glee While It Blends, Too.

So far I’ve used it just to make smoothies – and two glasses of carrot ginger juice. I’ve been drinking my breakfasts for a few years now, following almost the same recipe for all those mornings, so I’m on a quest to shake that up a bit. Today I invented a recipe (based on one of the recipes that came with the blender).

Violet’s Vitamin C Breakfast

Makes 2 servings. 

Ingredients:

1/2 cup of milk
1 orange, peeled
3/4 cup ice cubes
3 oz. frozen orange juice concentrate
3 tablespoons of wheat bran
1 scoop of vanilla soy protein powder
1/2 teaspoon of vanilla extract
1/2 tablespoon of honey

Directions:
Throw everything into the Blendtec in the order above. Hit the “whole juice” button.

Notes:
I add wheat bran and/or oat bran to almost everything.