Calzone.

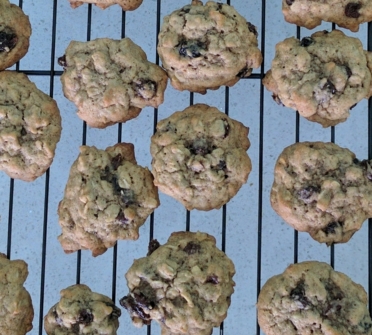
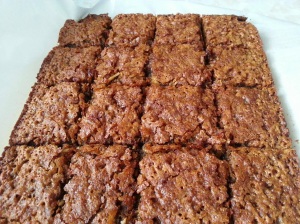
Okay, they look terrible. The lighting was garbage, I didn’t weigh out the dough, etc., etc. I always forget how fast and easy these are to make – and also how much I enjoy eating them. Maybe someday I’ll take a good picture and swap it out for what’s up there.

Makes: 4 calzone

Ingredients:

1 pound of pizza dough (I usually just buy the frozen ball from the grocery store)
1 tablespoon of olive oil, some melted butter, or my favourite: Garlic King garlic spread
1.5 tablespoons Italian seasoning (if you like it)
Maybe some coarse salt to sprinkle?
A bunch of whatever filling(s) you want – cheese, pepperoni, vegetables, tomato sauce, pulled pork.. literally whatever you want. See below for my favourite.

For my favourite filling:
1 cup ricotta cheese, drained as much as possible
1/2 cup grated cheese (any kind you like)
1/4 cup cheap-ass parmesan cheese
A bunch of black pepper
Maybe some garlic powder?

Instructions:

  1. Thaw the dough overnight in the fridge (if-needed) and then leave it on the counter for about an hour to rise a bit.
  2. Preheat the oven to 425F.
  3. Line baking sheet with parchment or silicone mat.
  4. Divide the dough into 4 equal balls – or just guess at it. Use your hands (or a rolling pin, I guess?) to flatten them into oval shapes.
  5. Add equal amount of topping to the bottom half of the oval. Make sure to leave room around the edge so you can crimp the dough together on step 7.
  6. Fold the top part of the oval over so you now have a semi-circle containing the filling.
  7. Pinch the edges tightly to seal them. Put the calzone onto the baking sheet.
  8. Brush the top of the calzone with oil, butter, or garlic spread. Sprinkle with Italian seasoning if you’re using it. Throw on some coarse salt if you like it.
  9. Using a sharp knife, cut a 2cm-ish slit into the top of each calzone.
  10. Bake for 15 minutes, rotate the pan, bake for another 2-5 (depending how dark you want your calzone to be toasted).
  11. Allow it to sit for a while because, holy shit, the filling is lava.
  12. These reheat just fine in the microwave or air fryer, depending on what you’ve got.

Best Banana Cake (With Brown Butter Frosting)

This is not a fancy-looking cake, it is a delicious cake. I can’t remember where I found the recipe originally, but it very quickly took over my banana bread‘s place in the recipe ranking. It’s somewhat dense, the frosting is ridiculously good, and the entire thing comes together pretty quickly.

Ingredients:

Cake:

1 1/2 cups white sugar
1 cup sour cream (I like to use 5% fat, minimum)
1/2 cup butter, room temp
2 eggs
1 3/4 cup mashed super-ripe bananas (3-6, depending on size)
2 teaspoons vanilla extract
2 cups white flour
1 teaspoon baking soda
3/4 teaspoon salt

Frosting:

1/2 cup butter
4 cups icing sugar
1 1/2 teaspoons vanilla extract
3 tablespoons milk

Instructions:

  1. Preheat oven to 375F. Butter and flour a 9×13″ pan, set aside.
  2. In a large bowl, cream the butter and sugar together. Add sour cream and eggs, mix until creamy. Add bananas and vanilla, mix well.
  3. In a small bowl, combine flour, baking soda, and salt. Add to wet mixture and blend for at least one minute.
  4. Spread batter evenly into the pan. Bake 20 to 25 minutes (until golden brown, and/or until a cake tester comes out clean).
  5. Remove from oven and set aside to cool. When the cake is nearly cool, make the frosting (it spreads onto a warm cake easier than on cold, but don’t panic if you let it sit too long.)
  6. Heat butter in a large saucepan over medium heat. Bring to a boil, stirring or whisking frequently, until the butter turns a delicate brown. Remove from heat immediately.
  7. Add icing sugar, vanilla extract, and milk. Whisk together until everything is smooth – add more milk if-needed. It should be much thicker than a glaze but a bit thinner than frosting (it will firm up on the cake as it cools).
  8. Spread the frosting over the warm cake. Allow to rest until the frosting has firmed up. Eat!

Blueberries & Cream Bundt Cake

Tiered Bundt Cake

One of my kids bought me this bundt cake pan – it has been on my amazon wishlist for a long time, waiting for a sale, because it is so pretty and also Nordic Ware is expensive and no one really needs bundt pans. Anyway, since it was a Solstice gift, I was not prepared for it and there was no way I was going to the grocery store to buy ingredients during the holiday season, so I had to make do with what I already had in my pantry. Luckily, I tend to be well-stocked for baking.

This was a new recipe for me. It turned out very well, and I enjoyed it (as did the people with whom I shared some) but it was a smidge challenging to swirl the cinnamon and brown sugar in the tiered pan. Tiered Bundt Cake!

Easy recipe, I didn’t change much from the original.

Blueberries & Cream Bundt Cake

Ingredients

  • 1 cup salted butter, softened
  • 2 cups white sugar
  • 2 large eggs, room temperature
  • 1.5 teaspoons vanilla extract
  • 1-3/4 cups all-purpose flour
  • 1 teaspoon baking powder
  • 1/4 teaspoon salt
  • 1 cup sour cream
  • 1 cup fresh or frozen unsweetened blueberries
  • 1/2 cup packed brown sugar
  • 2 teaspoons ground cinnamon

Directions

  1. Preheat oven to 350°F. Coat a 12 cup bundt pan with butter, flour it lightly.
  2. In the bowl of a mixer, cream butter and sugar until light and fluffy. Add room temperature eggs and beat well. Beat in vanilla. In a separate bowl, whisk together the flour, baking powder and salt; gradually add to the butter and sugar mixture, alternating with sour cream. When fully mixed, stir in the blueberries (if they are frozen, that’s okay; no need to thaw them).
  3. Butter and flour the bundt pan. Spoon about half of the batter the pan.
  4. In a small bowl, combine the brown sugar and cinnamon. Sprinkle half over the batter. Top with remaining batter and then sprinkle the top with the remaining brown sugar mixture.
  5. Cut through batter with a knife to swirl the brown sugar mixture. Try to get down to the bottom.
  6. Bake until a toothpick or cake tester inserted near the centre comes out clean. This took me about 65 minutes, but the original recipe suggested 55-60 minutes.
  7. Cool for 10 minutes before removing from pan to a wire rack to cool completely.
  8. Optional: dust with icing sugar after it has fully cooled.

Sweet Rhubarb Upside-Down Cake.

rhubarb_cake

Fresh out of the oven.

I am not a huge fan of rhubarb, but I keep trying. Everyone else seems to like it – in muffins or crumbles or.. whatevers.  This recipe called to me, and I had exactly 1 pound of rhubarb in my fridge, so I made some quick changes and popped this into the oven.

I am now fully in love with rhubarb. Or, at least, this recipe. Be forewarned: it’s really sweet and really tart!

Sweet Rhubarb Upside-Down Cake.

Ingredients:

  • 1 1/2 cups sugar, divided
  • tablespoons unsalted butter (room temperature)
  • 1/2 cup of butter (1 stick) and 6 tablespoons butter, cold.
  • Zest of one lemon + save the juice (you need 1 tablespoon + 2 teaspoons)
  • teaspoons vanilla extract
  • 1/2 teaspoon salt, divided
  • 1 pound rhubarb, trimmed and cut into 1-inch pieces
  • 2 1/2 cups all-purpose flour
  • teaspoons baking powder
  • 1/3 cup whole milk
  • 2eggs, lightly beaten

Directions:

  1. Heat oven to 375° F.
  2. Heat a 10″ cast iron skillet over medium. Add in 1 cup of sugar, 4 tablespoons butter (room temp), lemon zest, lemon juice, vanilla, and 1/4 teaspoon of salt. Stir gently while things melt and get goopy.
  3. When the butter and sugar have melted together, add the rhubarb pieces and cook, stirring occasionally. The rhubarb will give off quite a bit of moisture – that’s okay! Cook until the rhubarb is tender (approx 6 to 8 minutes). Allow to simmer while you complete the next steps.
  4. In a small bowl, whisk together remaining sugar and salt, plus flour and baking powder in a bowl. Add the cold butter, and use your fingers to rub the flour and butter together to form coarse pea-size chunks.
  5. Add milk and eggs and stir until a soft, sticky dough forms.
  6. Turn off the heat underneath the skillet (it’s okay to leave the skillet on the burner, though).  Take pieces of dough and stretch them gently – and place over the hot rhubarb mixture. Try to cover the entire surface. It’s okay for dough chunks to overlap – it’s a bit like making rhubarb cobbler! I ended up using only about 2/3rds of the dough because I wanted a bit less cake – if you’d like a thicker cake, use the full amount.
  7. Put the skillet onto a baking sheet (just in case of overflow!) and put into the centre of the pre-heated oven.  Bake until the cake is golden – for a 2/3rds dough, this will be about 25 minutes. For the full dough recipe, expect between 30 and 35 minutes.
  8. Remove baking sheet and skillet from the oven and let the cake rest for about 10 minutes.
  9. Place a platter or plate on top of the skillet and invert quickly and carefully. The rhubarb will be gooey and sticky on top. Yay!
  10. Serve warm or at room temperature!

Cinnamon Raisin Oatmeal Cookies.

oatmeals

So Good. So Many.

My husband loves this recipe because it contains some of his all-time favourite things: cinnamon, raisins, and oatmeal. I like this recipe because it makes at least 5 dozen (or more, if you’re careful about your sizing as you’re putting the dough onto the cookie sheets) and the baking time is short.  Also, I will admit that they’re really good cookies – chewy, soft, but substantial.

The key thing here is to NOT over-bake them.  You will want to bake them longer because they don’t quite look fully cooked when they come out of the oven, but I need you to resist that urge. Resist! They’ll bake a bit more as they’re cooling on the tray. I promise.

Cinnamon Oatmeal Raisin Cookies

Makes about 5 dozen cookies

Ingredients:

  • 1 cup raisins
  • 2 ¼ cups all-purpose flour
  • 1 teaspoon baking soda
  • 1 teaspoon salt
  • 3 tablespoons cinnamon (more/less to taste)
  • 1 cup butter, softened
  • ¾ cup granulated sugar
  • ¾ cup packed brown sugar
  • 1 teaspoon vanilla extract
  • 2 large eggs
  • 2 cups large flake oats (not instant oats)

Directions: 

  1.  Put the raisins in a small pot (ideally with a lid) and cover them with water by about 1 inch. Bring the water to a boil, covered if possible, and let the raisins ‘cook’ for 10 minutes in the boiling water.  When they finish boiling, drain them in a colander and set aside. This step will make the raisins soft and juicy and lovely in the cookies.
  2. Meanwhile, preheat oven to 375° F. Grab a bunch of cookie trays (enough for 5 dozen cookies, if you have enough) and put down parchment paper. (If you don’t have parchment paper, use non-stick trays – don’t grease or spray them.)
  3. In a small bowl, combine flour, baking soda, salt, and cinnamon.
  4. In a larger bowl, beat butter, granulated sugar, brown sugar, and vanilla extract until everything is mixed together and creamy.
  5. While beating, add eggs one at a time. Gradually add in flour mixture.
  6. Check that the raisins are cooled to room temperature – if not, give them a quick rinse under cold water. Drain again.
  7. Stir in the raisins and oats.
  8. Drop by rounded tablespoon onto baking sheets.
  9. Bake for about 8 minutes or until a very light golden brown. The edges will be a bit darker, and if you carefully lift one up you’ll see that the bottom is fully cooked and browned (but still not too dark!)
  10. Cool completely before removing them from the sheets.

Granola Bars, Violet-Style.

Mmmmm...

Mmmmm…

This is a recipe that I haven’t made in EONS, but my friend Kat asked if I had a recipe, so I figured I’d post it for my own future use. My kids really love it, so I should probably make it again at some point, right?

Homemade Granola Bars Violet-style.

Ingredients:
3 1/2 cups rolled oats (not quick-cooking)
1 cup high-fibre, crunchy cereal
1 cup whole wheat flour
1 teaspoon baking soda
1 teaspoon vanilla extract
1 cup melted margarine (or butter)
1/3 cup of brown sugar
2 cups of chocolate chips (or raisins, coconut, peanuts, etc.)
1 cup of honey (approx.)

Directions:
1. Preheat oven to 325F. Spray 11×13 pan with non-stick spray or grease with butter/margarine if you prefer.

2. Melt butter/margarine in microwave.

3. In a large bowl, mix oats, flour, baking soda, vanilla, melted butter, brown sugar.

4. One things are well-mixed, add in chocolate chips (or nuts, raisins,etc) Then add as much honey as required to make everything sticky (usually about 3/4 of a cup – but it depends on your dry ingredients)

5. Firmly press ingredients into the pan. Bake for 18-22 minutes or until golden brown. The bars will puff up around the edges a bit and the middle will still be soft. They will firm-up as they cool.

6. Remove from oven and allow to cool for about 5-10 minutes. Cut into bars and let cool fully in the pan before removing.


Notes:

You can add all sorts of good things to these bars. When one of my kids had a health issue that necessitated extra fibre, we added some of that powder stuff you can dissolve in juice. If I want to send these to school with the kids, I leave out anything nut-related (since the schools around here are nut-free).  I have no idea how long these will last in storage because they usually don’t last more than a few days in our house.

Banana-y Banana Bread.

IMG_20150325_104904

Bananay Banana Bread!


There are probably 990 kabillion banana bread recipes on the internet and in every grandmother’s cookbook. The problem, according to my husband, is that none of those recipes contain enough bananas.  A lot of them tell you to use an overly ripe banana, or maybe two, but depending on the size of your bananas, this one can take as many as 6.

It should not surprise you that this is really banana-y banana bread.

Bananay Banana Bread.

Ingredients:

2 cups all-purpose flour
1 teaspoon baking soda
2 teaspoons of cinnamon
1/4 teaspoon salt
1/2 cup of butter, softened
3/4 cup brown sugar
2 eggs, beaten
2 1/3 cups mashed overripe bananas 

Directions:

  1. Preheat oven to 350F. Lightly grease a 9×5 loaf pan.
  2. In a large bowl, combine flour, baking soda, cinnamon, and salt. In a separate bowl, cream together butter and brown sugar. Stir in eggs and mashed bananas until well blended. Stir banana mixture into flour mixture – stir just until moistened.
  3. Pour batter into loaf pan.
  4. Bake for 60-65 minutes, until a toothpick inserted into centre of the loaf comes out clean.
  5. Let bread cool in pan for 10 minutes then turn out onto a wire rack.

Notes:

This banana bread is dense and .. well, there are a lot of bananas in it. You can adjust the cinnamon to your preference – we often use closer to a tablespoon because it compliments the banana flavour (and because we like cinnamon).

Carrot Cake!

Carrot Cake!

Carrot Cake!

This carrot cake would have tasted better if I had pulled together a home made frosting for it – but, instead, I used some “cream cheese flavour” frosting from a can. I’m not going to lie – even with subpar frosting, this cake totally hit the spot.  It’s SO carrot-y that it’s a bizarre shade of orange and brown (from the cinnamon and nutmeg) and so incredibly moist!

Carrot Cake

Ingredients:

2 cups all purpose flour
2 teaspoons baking soda
2 teaspoons baking powder
1/2 teaspoons salt
4 teaspoons ground cinnamon
1/2 teaspoon nutmeg
4 eggs
1 1/4 cups canola or vegetable oil
1 cup granulated white sugar
1 cup packed brown sugar
2 teaspoons vanilla
4.5 cups grated carrots

Directions:

  1. Preheat your oven to 325°F. Line a 9”x 13” sheet pan (or two 9″ pans) with parchment paper.
  2. In a medium bowl, mix the flour,baking soda, baking powder, salt, cinnamon, and nutmeg.
  3. In a large bowl (or in your stand mixer bowl) mix together eggs, oil, sugars, and vanilla until well combined.
  4. Add the dry ingredients to the wet ingredients. Mix until well-combined.
  5. Stir in the grated carrots.
  6. Pour the batter into the prepared cake pan and bake for approx. 45 to 50 minutes.
  7. Cake is done when a skewer in the middle is not goopy.
  8. Cool fully before frosting.

Notes:

You could add a cup of nuts and/or a cup of raisins to this if you felt like getting crazy with things. I am not a huge fan of raisins and was totally not surprised when I discovered that mine had expired a year ago – and decided not to use them.

This cake is really, really moist because it is full of oil. If you’re the sort of person who prefers to eat a bit lighter in the calorie department, consider swapping out some of the oil for some applesauce.

Éclairs.

Mmmmm.

Mmmmm.

For some reason, this recipe didn’t make it here – so I am posting it now, even though there are no delicious éclairs in my kitchen right now.  I wish there were, and I would definitely be making some now if I had the ingredients handy, but it is ridiculous cold outside and I can’t bring myself to put on pants.

From my notes:

SO EASY! It was like magic watching them puff up. They really DO seem super-duper fancy and they really ARE super-duper easy to make. This looks like a really complicated recipe, given all the ingredients and steps, but it’s way easy.  For real. Trust me.

Chocolate Éclairs

Makes about 10 éclairs.

Ingredients:

For the choux pastry:

1/2 cup butter
1 cup water
1 cup all-purpose flour
1/4 tsp salt
4 large eggs

For the custard filling:

1 package instant vanilla pudding mix
2 cups milk
1 cup heavy cream
1/4 cup icing sugar
1 tsp vanilla extract
1/4 tsp salt

For the mocha frosting:

1 stick butter, softened
2.5 cups icing sugar (make it in your blender!)
1/8 cup cocoa powder
1/8 teaspoon salt
1.5 teaspoons vanilla extract
1/4 cup strong coffee, cooled


Directions:

Make the pastry:

  1. Preheat oven to 450F. Place a silpat mat on a large cookie sheet and grease lightly.
  2. In medium saucepan, combine 1/2 cup of butter and water. Bring to a boil, stirring, until butter is melted.
  3. Reduce the heat to low and stir in flour and salt with a wooden spoon until the mixture begins to form a stiff ball of dough. Remove from heat and move into the bowl of a stand mixer.
  4. Add eggs, one at a time, stirring vigorously after each addition to ensure they are incorporated. Work quickly so the eggs don’t cook before they’re mixed in!
  5. With a pastry bag fitted with a large tip, pipe the dough onto the prepared cookie sheet into 10 strips that are approximately 1.5 inches wide and about 4 inches long.
  6. Bake at 450F for 15 minutes, then reduce heat to 325 and bake for another 20 minutes. They’re ready when they’re puffy and golden and sound hollow when lightly tapped on the bottom.
  7. Remove them from the oven and immediately push a butter knife through the end, almost all the way through. This will let out steam and moisture – it’s also where you’ll be piping the custard in, so make sure the hole is large enough for that.
  8. Let cool completely.

Make the filling:

  1. Combine pudding and milk and mix according to package directions (easy!).
  2. In a separate bowl, beat the heavy cream with a handheld mixer until soft peaks form.
  3. Beat in 1/4 cup of icing sugar, 1 tsp vanilla, and 1/4 tsp salt.
  4. Gently fold the whipped cream into the pudding.
  5. Scoop the mixture into a pastry bag fitted with a medium tip – you may need to enlarge the holes in the éclairs to fit the tip.
  6. Pipe the filling mixture into the éclairs until each one is full. You will likely have filling left over.

Make the frosting:

  1. Combine the butter, powdered sugar, cocoa powder, salt and vanilla.
  2. Mix until slightly combined, then add 1/4 cup of the coffee.
  3. Whip until the icing is light and fluffy.
  4. Smear onto the top of the eclairs. Or, if you’re fancy, do something fancy with a piping bag or, y’know, whatever.

Notes:

Store in the fridge. These get soggy after a day, though, so don’t expect to be able to make them too far in advance of eating (which sucks, because once people try them they really want you to make them for all occasions!) Even though the recipe makes about 10, they will disappear really quickly.

Banana Coconut Chocolate Chip Snack Bars.

.. more like rectangles.

.. tasty, chewy, golden..

I had a few extra bananas sitting around and wanted to try something other than the usual loaf of banana bread (even though I have an amazing banana bread recipe). Browsing around, I stumbled across a recipe for “snack cake”. Following some of the modifications suggested by other bakers in the comment section, I whipped up this recipe. They turned out more like bars than cake but oh, they’re good.

Be forewarned – they’re really sweet, chewy, a bit crispy on the edges, and are absolutely not a healthy sort of snack.

Banana Coconut Chocolate Chip Snack Bars

Ingredients:

ripe bananas
large eggs
cups white sugar
2 tablespoons molasses
teaspoon vanilla
8 tablespoons coconut oil
cup all-purpose flour
3/4 teaspoon fine sea salt
1/2 cup semi-sweet chocolate chips
1 cup of shredded coconut (sweetened)

Directions:

  1. Line a 9×13 baking pan with parchment paper (including the sides). Pre-heat your oven to 350 degrees.
  2. In a large bowl, or in your stand mixer (if you’re lazy), mash up the bananas. Add in the eggs, sugar, molasses, vanilla, and coconut oil. Stir it all up well.
  3. Combine the flour and salt in a small bowl. Add the flour mixture to the wet ingredients. Stir until everything is nicely combined. Don’t get crazy with this.
  4. Add chocolate chips and coconut and stir, again, just until mixed together.
  5. Pour batter into the prepared pan.
  6. Bake for 45 to 55 minutes (or until a toothpick comes out mostly clean).
  7. Cool fully before slicing.

Note:
My friend Alice took this recipe and made mini muffins – she baked them for about 25 minutes, or just until the top wasn’t mushy. I’m definitely going to try that next time because it was much neater and tidier and way easier to eat.